Gantt charts can help to give you a big picture overview of your Trello boards, identify bottlenecks in your planning and boost productivity. Ganttify allows you to easily create gantt charts for your Trello boards.
When managing your projects in Trello while collaborating with your co-workers or clients, Ganttify can create a powerful big picture overview of one or multiple projects at once by creating gantt charts for your Trello boards.
Ganttify functions as a powerful addition to your Trello boards. By connecting Trello to your Ganttify account, it allows you to create a gantt chart based on your current Trello board contents. You can then choose to update the planning right from within the Gantt chart, share the chart with clients or co-workers and keep everyone on track easily without the need to install any software or browser plugins on your computer.
Easily create Gantt charts for Trello without installing any software or browser plugins.
Let's get started.
This article serves as a quick guide to get you started using Ganttify for your Trello boards. I assume you already have a Ganttify account and know how to open one of your Trello boards in Ganttify before we get started. If not, you can sign up for a free 14-day trial.
Visualising your Trello planning in a Gantt chart
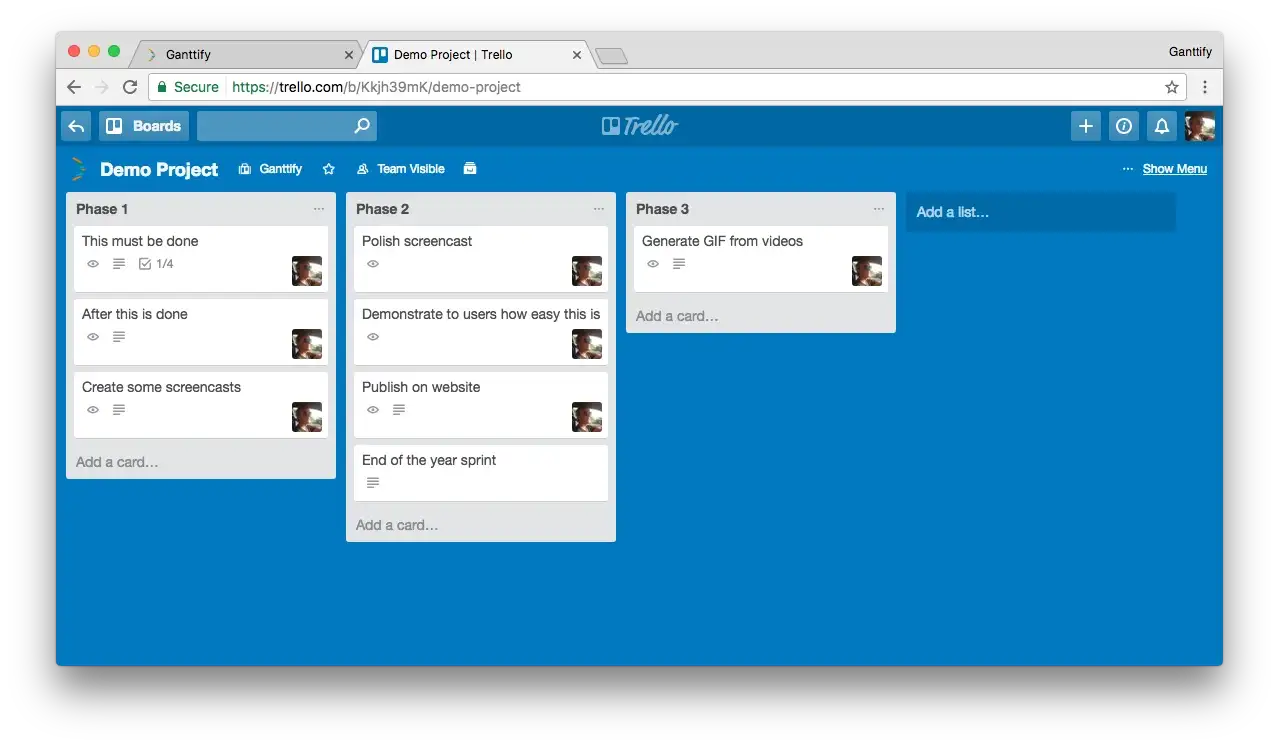
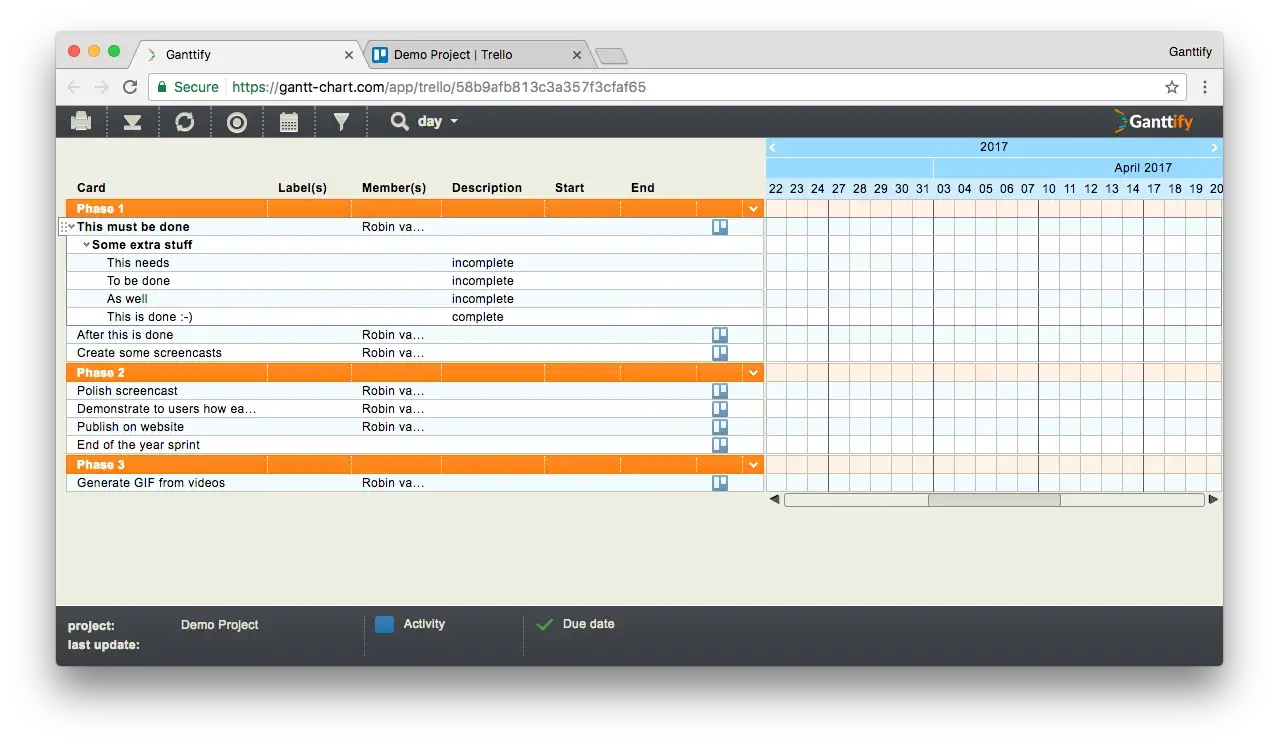
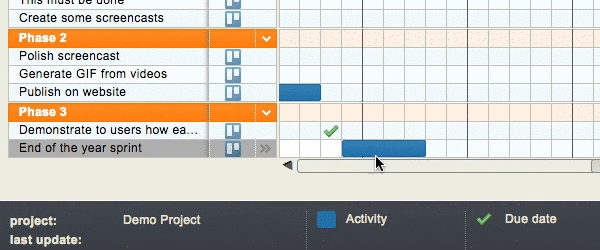
First we will open our Trello board Demo Project in Ganttify. For the purpose of this demonstration, I filled to board with some common Trello data: a couple of lists, some cards in these lists and a couple of checklists in these cards.
When opening this board in Ganttify, we will initially end up with an empty board like this one:
Adding durations and due dates to Trello cards
The power of Ganttify relies in the right-click menu. Within the Gantt chart, you can add, remove and edit almost anything with your mouse using either the left click (drag/drop) or right-click menu.
You can add durations and due dates to entire Trello cards but you can also specify this information on a specific checklist item within a Trello card. This allows for precise planning of tasks inside checklists.
Adding a due date to a Trello card
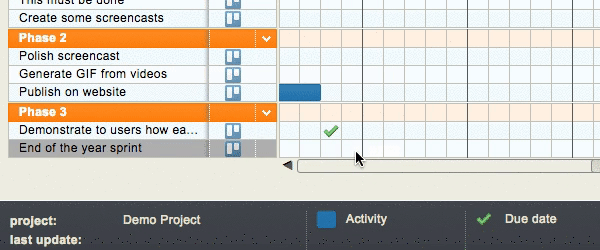
Some activities simply don’t span over multiple hours, days or weeks. All you need is a simple indication that this particular card is due on a certain date.
That’s where the due date markers (green checkmarks) come in handy. Just as you did before, simply right-click the Gantt chart’s grid area and this time choose ‘set due date’. A green checkmark will show up which can be dragged to it’s desired position easily.
Removing activity data from a Trello card
While adding activity data to a Trello card is as simple as right-clicking the grid and choosing ‘Set duration and due date ’, removing that same data is just as easy.
Simply right-click the previously added activity (period bar or green checkmark) and choose ‘remove activity ’ as shown below:
This should get you started creating a Gantt chart for Trello. Go to your project list in Ganttify and try for yourself!